


Need a new roof? Are you trying to figure out what exactly gets replaced, installed, and, most importantly, what you’re paying for?
This is understandable, especially considering a roof isn’t just the top layer you see from the ground. In fact, the anatomy of a roof system is a combination of multiple materials and components that each have a specific purpose.
So, what is the anatomy of a roof system? And what do you need to know about each piece of the puzzle?
At Bill Ragan Roofing, I use our 35-plus years of roofing experience to help homeowners like you understand everything that goes into a roof system. And nothing is more important than knowing the things that actually make a roof a roof.
Just know this article won’t cover the general construction aspect of a roof and home, like rafters or trusses. Instead, I’ll break down the following materials that make up the anatomy of a roof system:
- Roof decking
- Drip edge
- Underlayment
- Ice and water shield
- Flashing
- Starter shingles
- Main roofing material
- Ridge and hip capping
- Roof vents
- Pipe boots
Roof decking
Roof decking (also called roof sheathing) is the wooden foundation (plywood or planks) and the first official roof layer. Your roof will have one of two types: plank or sheet decking.
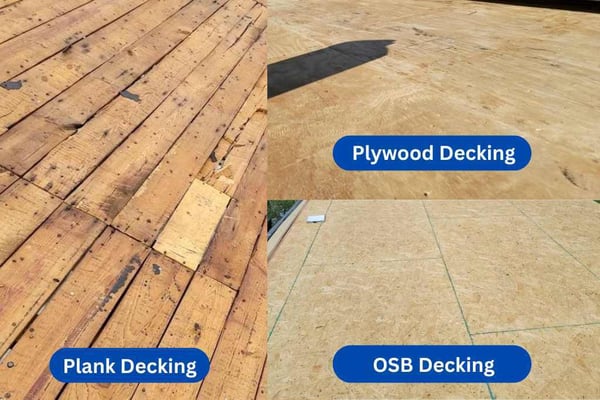
Plank decking is made of 1x6 or 1x8 rectangular wooden boards, depending on the span of your rafters. Sheet decking (or sheathing) is made of flat sheets of wood that cover more area than planks.
There are two types of sheet decking: OSB and plywood. OSB (oriented strand board) consists of wood chips/strips compressed together to form a flat 7/16” sheet, while plywood comes in several different thicknesses (⅜”, ½”, ⅝”, and ¾”).
Just know that any rotten or compromised roof decking must be replaced before installation begins. However, your roofing contractor won’t know how much will need replacing until after the tear off process of your roof replacement.
Drip edge
Drip edge is metal flashing installed at the roof’s edges (eaves and rakes) to prevent water from getting underneath the roofing material and going behind your gutters. It’s such an important piece of a roof’s anatomy that it’s actually required per building codes and must be installed correctly.
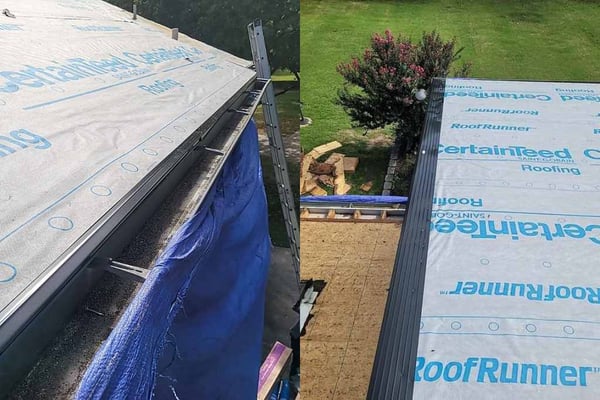
Not only will your home fail an inspection without it, but your fascia board and roof decking’s edges will rot from prolonged exposure to water. So, its importance can’t be overstated.
Unfortunately, there are too many roofs without drip edge. It can be left off by laziness or lack of experience, but bad roofers knowingly exclude it from their estimates to lower prices.
Underlayment
Roof underlayment is a felt or synthetic material installed directly over your roof decking before the roofing material is installed. Its purpose is to provide a layer of protection for your decking if water gets underneath your roofing material.
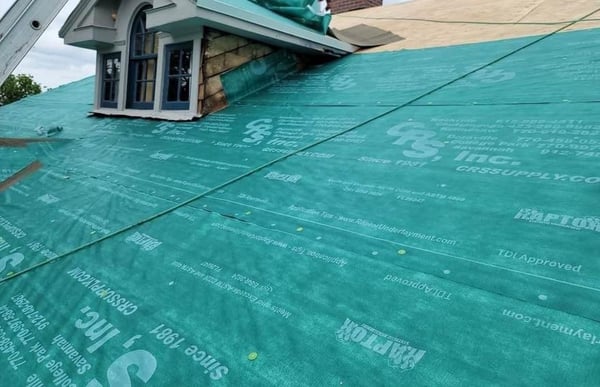 (Synthetic underlayment)
The two types of underlayment options are felt and synthetic.
Felt underlayment has been around the roofing industry longer than synthetic and comes in 15 lb. and 30 lb. rolls. Both types do the job, but 30 lb. felt underlayment is thicker, stronger, and less likely to tear than 15 lb.
Synthetic underlayment is made out of woven/spun polyethylene or polypropylene, which means it won’t hold moisture. It’s more durable, holds nails better, and repels water better than felt underlayment.
Felt isn’t a bad choice, but I recommend spending the extra money for the functionality and better water protection synthetic underlayment offers.
Ice and water shield
Like underlayment, ice and water shield is a waterproof membrane that protects your roof from ice and water damage if it gets under your roofing material. But unlike underlayment, it’s installed on/around certain problem areas that need added protection instead of over the entire roof deck.
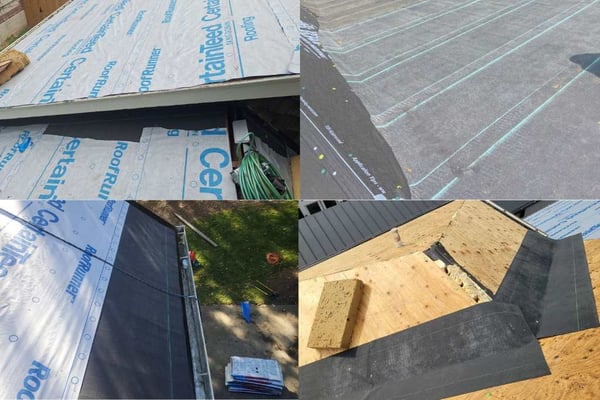
Ice and water shield is mainly installed in roof valleys, around penetrations, and on roofs with a 2/12, 3/12, or 4/12 pitch. But if you live above the snowline in the US, building codes also require two rows of it along the edges of your roof to prevent leaking from ice damming.
This is considered an "upgrade" in areas like Middle Tennessee to prevent ice damming leaks when we get heavy snowfall.
Roof flashing
Roof flashing is a metal material that directs water away from areas (walls, chimneys, roof valleys) where the roofing material butts up against something. It’s one of the most important components, and you’ll definitely have roof leaks without it.
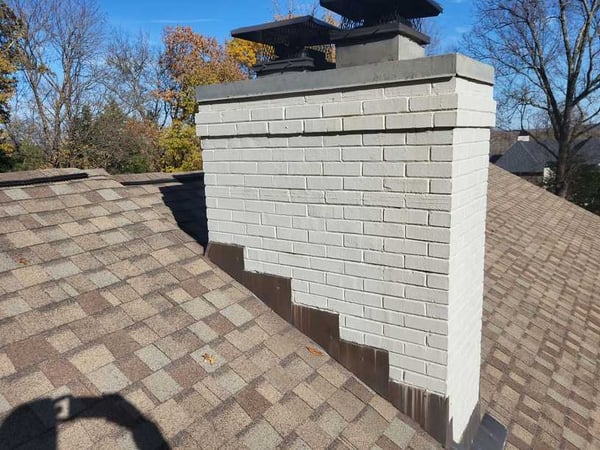 (Counter flashing on a brick chimney)
Roof flashing can be any metal type, but aluminum, steel, and copper are the most common metals. Also, the specific type of roof flashing used depends on where it's installed and the building material it's installed against.
The main types of roof flashing are:
- Counter flashing
- Step flashing
- Apron flashing
- Valley flashing
While roof flashing usually outlives the other components, it's always recommend replacing it when getting a new roof if the existing metal is questionable. This is simply to prevent future problems and ensure everything installed on your roof is the same age.
Starter shingles
Starter shingles are an asphalt-based roofing accessory used as the first course of shingles on the edges of asphalt roofs. They look like shingles without the tabs but are thinner and pre-cut for easy installation.
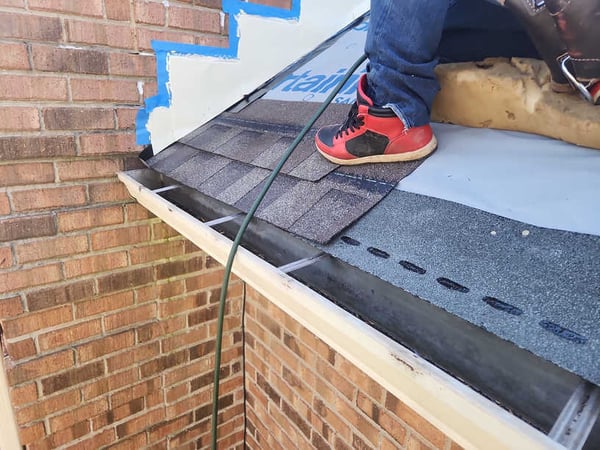
Starter shingles are installed along the rakes and eaves over the underlayment before the actual shingles are installed on top of them. While this is mainly for asphalt shingles, every roofing material has a starter component.
Roofing material
Your roofing material is the top layer that makes up the bulk of the roof system you see from the outside. There are plenty of options, but the most popular residential roofing materials are asphalt shingles, standing seam metal roofing, cedar shake roofing, synthetic roofing, and slate roofing.
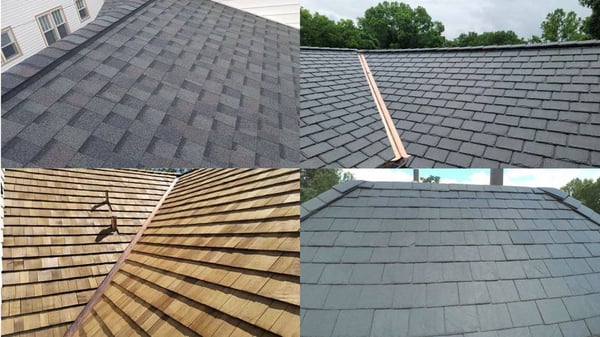
The one you choose greatly impacts your new roof's cost, aesthetic, lifespan, and warranty options. That’s why it’s important to do the research to pick the right one for you and your budget.
Ridge and hip capping
Ridge capping is installed where two slopes meet to completely seal your roof system at the very top. It will be made of the same material as the main roofing material, except that it’s pre-bent to form perfectly on a roof’s ridge.
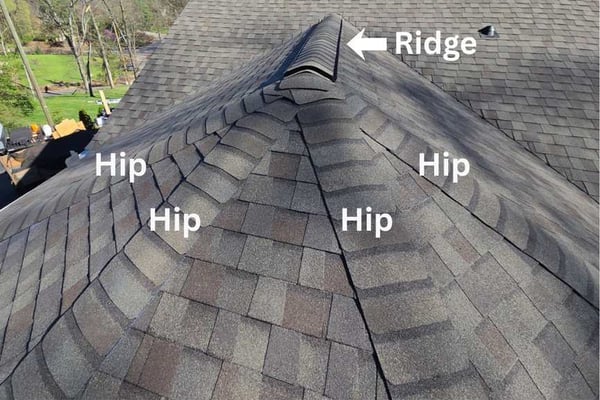
No matter which roofing material you choose, your roof needs the associated ridge capping. While ridge capping is needed on the ridge, there's also hip capping on hips.
Roof vents
Roof vents allow your attic and home to breathe properly by pulling fresh air through intake vents before pushing it out of exhaust vents. There are multiple vent options, but the type of ventilation system (active and passive) narrows down the choices.
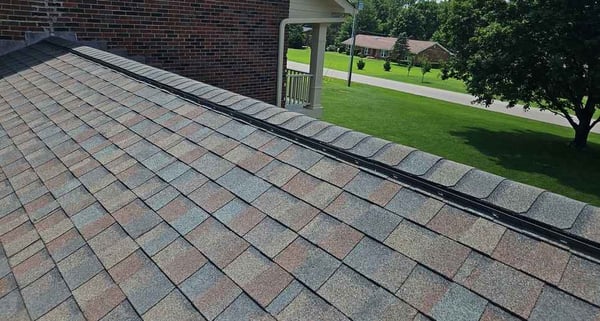 (Ridge vent on an asphalt shingle roof)
For an active ventilation system, the most common options are turbine vents, power vents, ridge vents with a baffle, or solar-powered vents. For a passive ventilation system, you’ll have static vents (box vents), ridge vents without a baffle, or gable-end vent.
While certain vents are better for certain roof styles, I recommend an active ventilation system for performance reasons. But no matter the system, it’s crucial that your attic is ventilated properly to avoid cutting your roof's life drastically short.
Pipe boots
A pipe boot (also called roof boot) is a type of flashing that goes around the base of the pipes coming out of your roof. Without them, water leaks down the pipes into your attic and home.
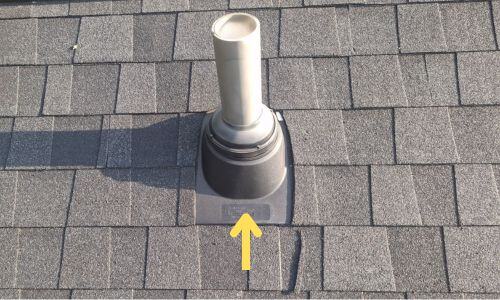
Depending on the roofing material and type of pipe, pipe boots can be synthetic rubber, plastic, lead copper, etc. While you have these options, the most common type of pipe boot used on roofs today is a synthetic rubber called neoprene.
Just know that neoprene pipe boots will need replacing every 10 years or so once cracks form. However, they’ll be cheaper than copper (or another metal), more durable than plastic, and won’t attract animals like lead.
What should you consider before getting a new roof?
Now you know the anatomy of a roof system, what every layer does, and the different options for each. At the end of the day, every single component must be part of your roof system to avoid costly problems.
However, this is just the beginning of what you need to know before getting a new roof. A roof replacement is a large and expensive home improvement project but also complex.
Trust me, the last thing you want is to be taken advantage of by a bad roofer or make the wrong decisions. That’s why I wrote another article breaking down the things every homeowner needs to consider before getting a new roof.
Check out 7 Things to Consider Before a Roof Replacement so you go into the process with the right mindset and information needed to get the best roof possible.