A standing metal roof isn’t just a couple of panels you throw on a roof. While the panels make up the bulk of a metal roof, each component has a specific function.
In fact, it’s actually like a puzzle where every piece needs to be in the right place to prevent water from leaking into your home. You may think you don’t need to know what they are, but the last thing you want is to sign an estimate with something missing.
So, what materials make up a standing seam metal roof?
For over 30 years, the team at Bill Ragan Roofing has helped homeowners understand everything that goes into their new roof. That’s why I want to break down the main parts of a standing seam metal roof system.
This article covers the following 7 materials of a standing seam metal roof:
- Roof decking
- Lock strip
- Underlayment
- Metal panels
- Clips
- Z bar
- Ridge capping and transition metal
1. Roof decking
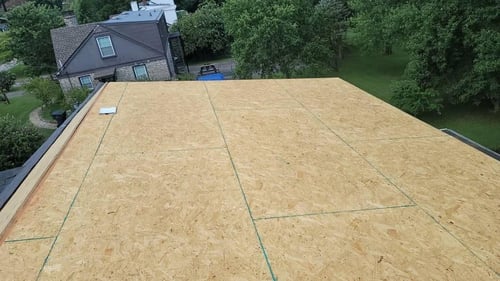
Roof decking (also called sheathing) is the wooden boards (plywood, OSB, plank) that the rest of a standing metal roof is installed on. Your roof decking must be inspected for rotting or damage to ensure it can handle the weight and materials.
 (OSB roof decking)
If your roofer does find damaged decking, it must be replaced before installing your standing metal roof. There’s a good chance you’ll need some replacement decking, but it’s rare to need entire sections or the full roof deck replaced.
However, you won’t know how much will get replaced until after tearing off your old roof.
2. Lock strip
Lock strips hold (lock) the metal panels down to the edges to prevent them from flapping in the wind during strong storms. They’ll be installed at the eaves (bottom edge of your roof) and rakes (the slanting edge of your roof) before installing the panels.
They’ll be the same color, type of metal, and gauge as the standing seam panels. The most commonly used type is a 24 gauge pre-finished steel with a Kynar 500 finish, but it really depends on the type of metal panels you choose.
3. High heat ice and water shield as underlayment
Underlayment is usually a felt (15 lb. or 30 lb.) or synthetic material used over the decking to provide another layer of protection. But for a standing seam metal roof, the underlayment should be a self-adhering, high-heat ice and water shield.
 (High heat ice and water shield before metal panel installation)
The metal panels going back and forth during thermal expansion destroy normal underlayment. But because high-heat ice and water shield has cotton-like fibers, it doesn’t stick to the metal panels as they expand and contract.
This prevents the underlayment from being destroyed and ensures your decking is protected if water gets underneath the metal panels.
4. Standing seam metal panels
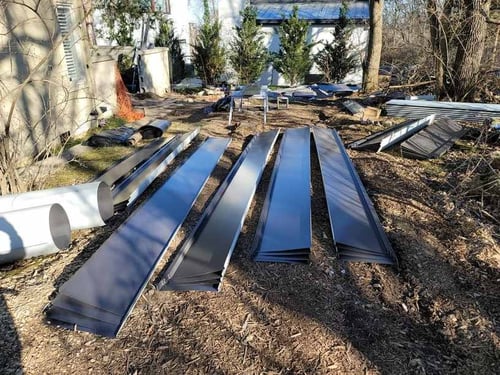
The standing metal panels are obviously what you’ll see on the roof and make up the bulk of the roof system. They are attached to the roof deck by lock strips and connected together with clips at the ribs (seams) to form a closed roof.

The ribs themselves are generally 12 to 24 inches apart, depending on how long the panel is. Because they’re connected at the seams, there aren’t holes from nails or other fasteners that could let moisture or water get through.
While steel is the most commonly used type, there are plenty of metals to choose from for standing seam metal panels.
5. Clips
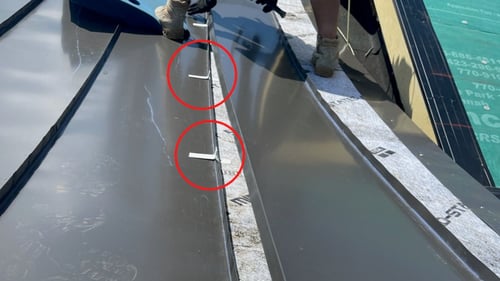
As I just said, clips lock your metal panels together to form a standing seam metal roof. Every 12 to 24 inches, these clips are screwed to the vertical part of the panel using two gimlet screws.

Once the clip is installed, the next panel snaps on top of the clip, fastening it to the other panel. This continues across the roof until you get to the lock strip on the edge.
6. Z bar
A z bar is metal bent in the shape of a Z that is 1/8th of an inch taller than the ribs on the metal panels. This piece of metal flashing is installed to fill in the spots between the ribs and the ridge capping.
This prevents water from getting through the rib gaps at the top of your roof or where the metal transitions.
7. Ridge capping or transition metal
Ridge capping is installed at the top of two slopes where they connect. A standing seam metal roof’s ridge capping will be the same type and color as the metal panels.
.jpg?width=500&height=300&name=Blog%20Images%20(3).jpg)
But you'll also need transition metal if your panels come from a low-slope roof to a steeper slope. The transition metal should come down and out 6 inches to ensure there's a straight plane all the way across to lock onto the Z bar.
.jpg?width=500&height=300&name=Blog%20Images%20(2).jpg)
Once your ridge capping or transition metal is installed, your metal panels will be completely locked together and form a complete roof system.
How do you install a standing seam metal roof?
Now you know the 7 materials that make up a standing seam roof system. Knowing these materials gives you a better understanding of everything that goes into a metal roof.
And as long as they’re installed properly, a standing seam metal roof system will be the last roof you ever put on your home. This makes the day it’s installed the most important day for your metal roof investment.
So, now that you know the individual components, you need to know how it all comes together. That’s why I wrote another article that breaks down how to properly install a standing seam metal roof.
Check out How is Your Standing Seam Metal Roof Installed? (6-Step Process) to learn what happens on the most important day in your roof’s life.


