
The day of your roof replacement is the most important day in your new roof’s life. So, of course you want it to go smoothly.
However, it’s a chaotic process that can worry homeowners as soon as they see unknown vehicles in their driveway and things start flying around. This is especially true if your roofer doesn’t take the time to explain the process.
For over 30 years, the team at Bill Ragan Roofing has helped homeowners understand every aspect of getting a new roof. That’s why I want to break down the roof replacement process you can expect when working with a reputable roofer.
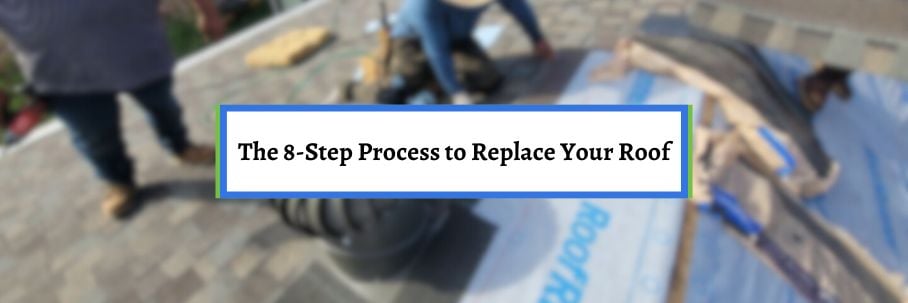
Below is the 8-step process to replace your roof from beginning to end.
1. The roofing materials get delivered to your home
The first step of a roof replacement is getting all the roofing materials delivered to your home, usually the afternoon before or morning of the project. A reputable roofer will never deliver the materials multiple days in advance unless inclement weather delays them starting the project.
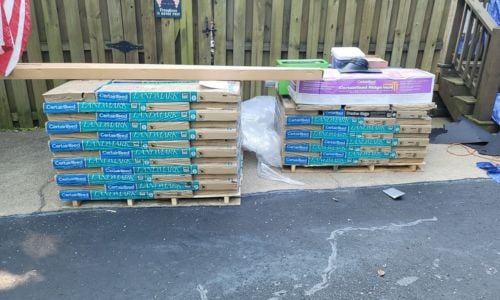
The delivery will be unloaded on a paved surface near the roof access point in a dry area. If the pallets of shingles and materials are not placed on a paved surface, you’ll wind up with dead grass.
The delivery size depends on the materials being replaced and how many squares (100 square foot roof area) of shingles will be installed. If you have a large roof, the delivery can take up a pretty large area.
2. Initial walkthrough and set up
On the morning of your roof replacement, your roofer will take pictures of noticeable damages before any work begins. They’ll look for torn window screens, dented gutters, damaged light fixtures, or any other damage around the roof line.
Homeowners don’t usually notice existing damage until they look up and think it was done during their roof replacement. However, you should also take pictures the day before your roof replacement in case you find damage afterward.
While this is happening, the crew finds the access point, prepares their tools, sets up generators, and does whatever else they need to get started.
3. Precautions are set up to protect your property
Once everything is in place, the roofers start the actual roof replacement process by setting up precautions to protect your property. They attach tarps to the roof line and/or lean wooden boards against the exterior walls to cover anything around the base of your home.
.jpg?width=500&height=300&name=PropertyProtection%20(2).jpg)
This controls where debris goes by letting it slide to the right areas instead of falling on your landscaping. It also creates specific dump zones, so cleaning up debris and taking it to the dump trailer is more efficient.
Your roofer will also cover your attic and pool (if applicable), move things off your patio/deck, and ensure all their vehicles stay on paved surfaces.
4. Tearing off your roof
Once your property is protected, the tear-off process begins. Your old roof will be torn off in sections, starting on the furthest corner away from your driveway and gradually moving towards the dump trailer.
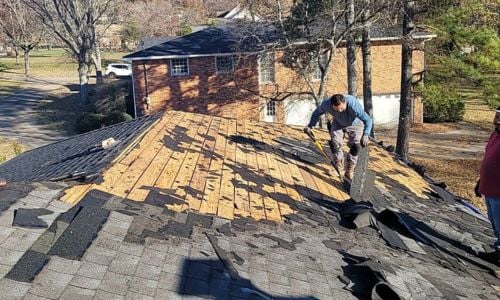
While some of the crew is tearing off, others pick up the debris to ensure it gets to the right area. A couple of people will also be on the ground to ensure nothing gets away and everything coming off gets to the dump trailer.
As soon as a section is torn off and cleaned up, your gutters will also be cleaned out, and installation can begin.
5. Replacing compromised or rotten roof decking
After tearing off a section, your roof decking needs to be inspected for rotting, broken, or compromised wooden boards. If your roofer finds any signs of damaged decking, it must be replaced before installing the new materials.
It’s rare to need entire sections or the full roof deck replaced, but there’s a good chance that some will. Just know that plank decking with more than a 1/8” between the planks must also be replaced, whether they’re damaged or not.
This is per shingle manufacturers’ installation instructions, which must be followed exactly or your warranties are voided.
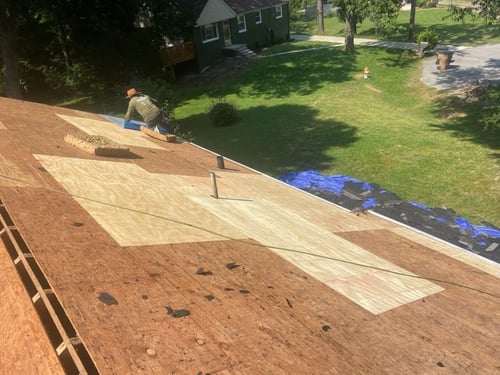
6. Your roof new roof is installed
After tearing off your old roof and replacing any damaged decking, it’s time to install the new materials. The crew begins by installing drip edge on your roof’s edges, ice and water shield in roof valleys (and other problem areas), and replacing the roof flashing.
Next, underlayment is installed over the entire roof decking, which must go over the drip edge along the eaves and under the drip edge on the rakes. Once your roof is dried in with underlayment, shingle installation can begin.
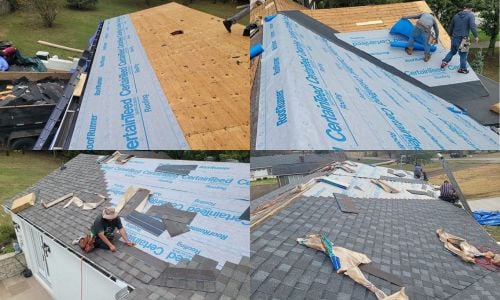
They’ll start with a row of starter shingles, followed by rows of shingles, starting at the bottom and working up to the ridge. When they’re done with the shingles, they’ll install ridge capping and replace the roof vents.
After this is completed, your old roof has now been replaced with a brand new one. But that doesn’t mean the roof replacement process is over.
7. Cleaning up after your roof replacement is complete
Once your roof is installed and fully replaced, it's time to clean up. The crew will blow off your roof, gutters, and downspouts to ensure all leftover debris reaches the dump tarps.
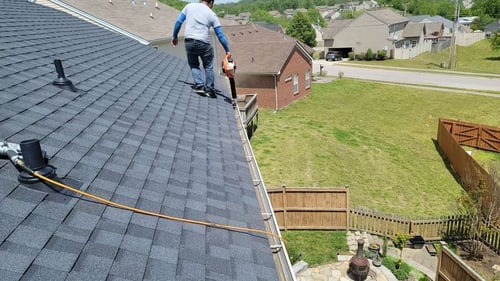
Next, they’ll spend a couple of hours on the ground rolling up tarps, getting their tools, and cleaning up everything on the ground. They should also take a few passes through your yard and check the landscaping for any missed debris.
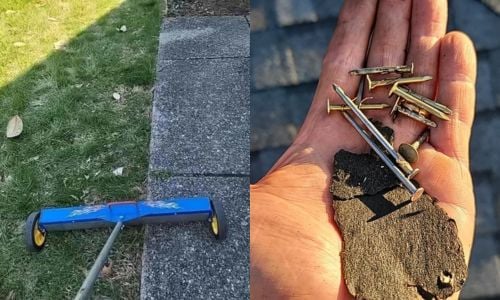
Someone will also go all over your property with a strong magnet to ensure there are no loose nails sitting around. After they clean up and leave, you shouldn’t be able to tell roofers were there in the first place.
8. Final inspection and walkthrough
After the full roof replacement process is complete, your roofer will double-check the finished product. They’ll inspect the roof to ensure it’s properly installed and areas known to leak frequently (around penetrations, skylights, chimneys, etc.) are properly protected.
Once off your roof, they’ll do a final check around your home for missed debris, nails, or other trash. If you want reassurance, a reputable roofer shouldn’t have any problem doing a walkthrough with you to answer questions.
With your roof replacement complete and you're satisfied with the work, you’ll get your warranty information and make the final payment.
What can go wrong during the roof replacement process?
Now you know what to expect during the roof replacement process. Just know that the exact steps vary from roofer to roofer.
However, you’ll find most reputable roofing companies follow the same principles and general process. Unfortunately, the process doesn’t always go smoothly.
There’s always a chance things will go wrong during a roof replacement, and some are even controllable. But knowing what can go wrong can actually help you avoid them from happening in the first place.
That’s why I wrote another article breaking down the things that can go wrong during the roof replacement process.
Check out 8 Things That Can Go Wrong During a Roof Replacement to continue preparing for the most important day in your roof’s life.